Updated: 4/8/2014 (Note that these instructions are for Cloudera Enterprise 4. To use StackIQ Cluster Manager with Cloudera Enterprise 5, please contact support@stackiq.com)
StackIQ takes a “software defined infrastructure” approach to provision and manage cluster infrastructure that sits below Big Data applications like Hadoop. In this post, we’ll discuss how this is done, followed by a step-by-step guide to installing Cloudera Manager on top of StackIQ’s management system.
Components:
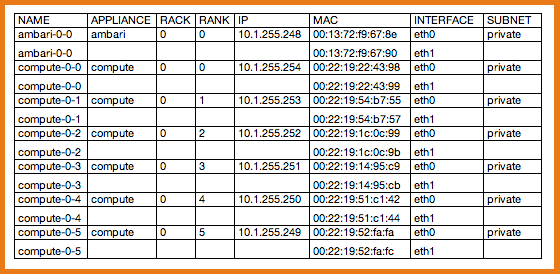
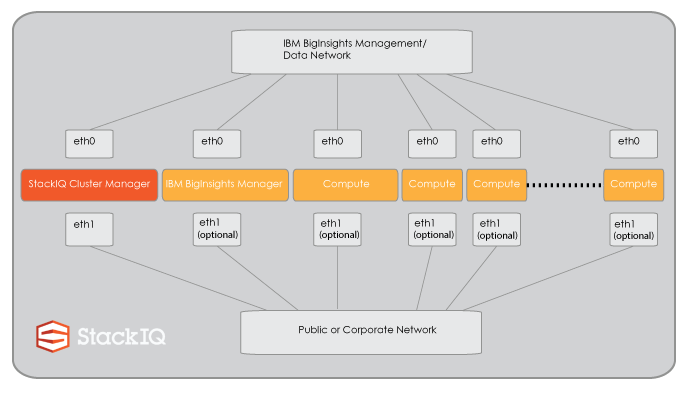
The hardware used for this deployment was a small cluster: 1 node (i.e. 1 server) is used for the StackIQ Cluster Manager and 4 nodes are used as backend/data nodes. Each node has 2 disks and all nodes are connected together via 1Gb Ethernet on a private network. The StackIQ Cluster Manager node is also connected to a public network using its second NIC. StackIQ Cluster Manager has been used in similar deployments between 2 nodes and 4,000+ nodes.
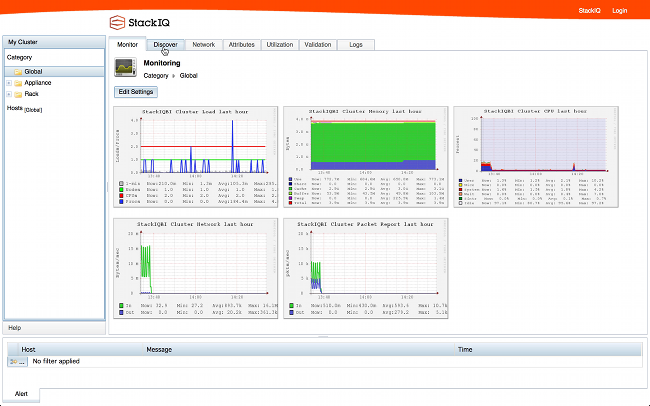
.png?t=1412202110685 "Image 1 resized 600")
Step 1: Install StackIQ Cluster Manager
The StackIQ Cluster Manager node is installed from bare metal (i.e. there is no prerequisite software and no operating system previously installed) by burning the StackIQ Cluster Core Roll ISO to DVD and booting from it (the StackIQ Cluster Core Roll can be downloaded from the Rolls section after registering). The Core Roll leads the user through a few simple forms (e.g., what is the IP address of the Cluster Manager, what is the gateway, DNS server) and then asks for a base OS DVD (for example, Red Hat Enterprise Linux 6.5; other Red Hat-like distributions such as CentOS are supported as well). The installer copies all the bits from both DVDs and automatically creates a new Red Hat distribution by blending the packages from both DVDs together.
The remainder of the Cluster Manager installation requires no further manual steps and this entire step takes between 30 to 40 minutes.
Step 2: Install the CDH Bridge Roll
StackIQ has developed software that “bridges” our core infrastructure management solution to Cloudera’s Hadoop distribution that we’ve named the CDH Bridge Roll. One feature of our management solution is that it records several parameters about each backend node (e.g., number of CPUs, networking configuration, disk partitions) in a local database. After StackIQ Cluster Manager is installed and booted, it is time to download and install the CDH Bridge Roll:
-
Log into the frontend as "root", download cdh-bridge ISO from here.
-
Then execute the following comands at the root prompt"
# rocks add roll <path_to_iso>
# rocks enable roll cdh-bridge
# rocks create distro
# rocks run roll cdh-bridge | sh
The cluster is now configured to install Cloudera packages on all nodes.
Step 3: Install Cloudera Manager and Cloudera CDH4 Roll
You can download a prepackaged Cloudera Manager here and a prepackaged Cloudera CDH4 from here.
We will now install these 2 ISOs.
rocks add roll cloudera-cdh4/cloudera-cdh4-6.5-0.x86_64.disk1.iso
rocks add roll cloudera-manager/cloudera-manager-6.5-0.x86_64.disk1.iso
rocks enable roll cloudera-cdh4
rocks enable roll cloudera-manager
rocks create distro
rocks run roll cloudera-cdh4 | sh
rocks run roll cloudera-manager | sh
Step 4: Install the backend nodes
Before we install the backend nodes (also known as compute nodes), we want to ensure that all disks in the backend nodes are optimally configured for HDFS. During an installation of a data node, our software interacts with the disk controller to optimally configure it based on the node’s intended role. For data nodes, the disk controller will be configured in “JBOD mode” with each disk configured as a RAID 0, a single partition will be placed on each data disk and a single file system will be created on that partition. For example, if a data node has one boot disk and 4 data disks, after the node installs and boots, you’ll see the following 4 file systems on the data disks: /hadoop01, /hadoop02, /hadoop03 and /hadoop04.
For more information on this feature, see our blog post Why Automation is the Secret Ingredient for Big Data Clusters.
Now we don’t want to reconfigure the controller and reformat disks on every installation, so we need to instruct the StackIQ Cluster Manager to perform this task the next time the backend nodes install. We do this by setting an attribute (“nukedisks”) with the rocks command line:
# rocks set appliance attr compute nukedisks true
# rocks set appliance attr cdh-manager nukedisks true
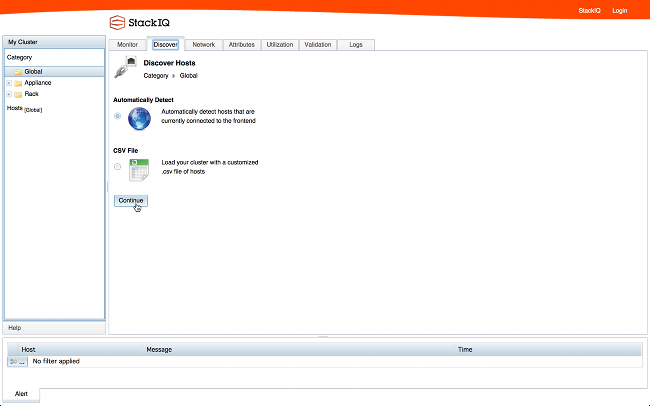
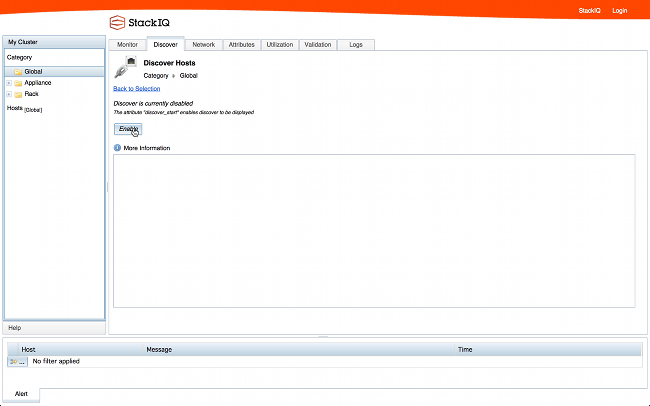
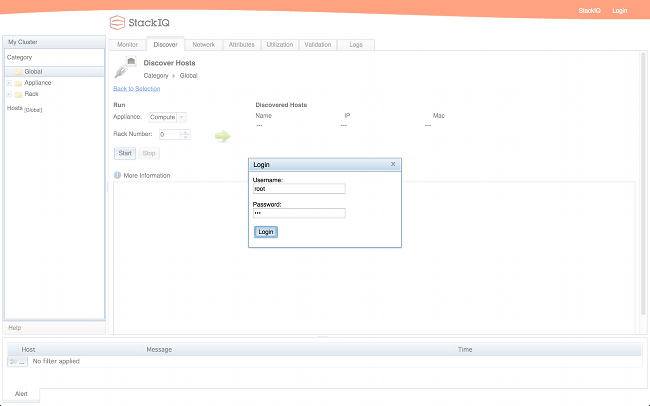
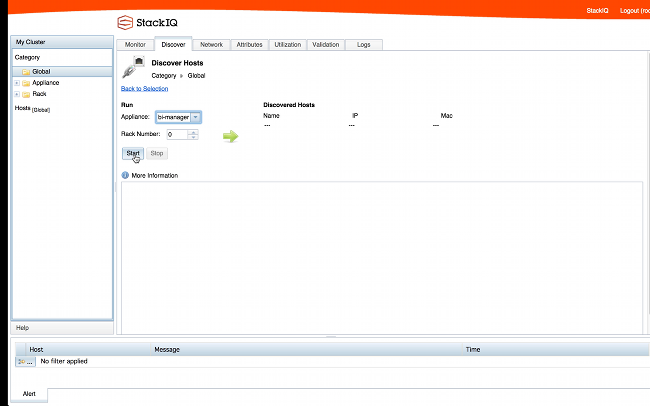
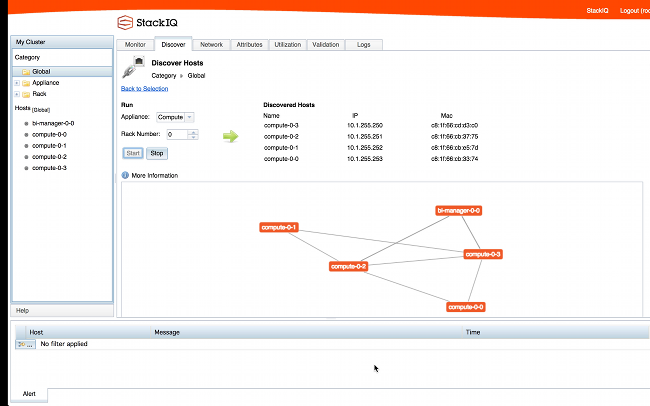
Now we are ready to install the backend nodes. First we put the StackIQ Cluster Manager into "discovery" mode using the CLI or GUI and all backend nodes are PXE booted. We will boot the first node as a cdh-manager appliance. The cdh-manager node will run the Cloudera Manager web admin console used to configure, monitor and manager CDH.
-resized-600.png?t=1412202110685)
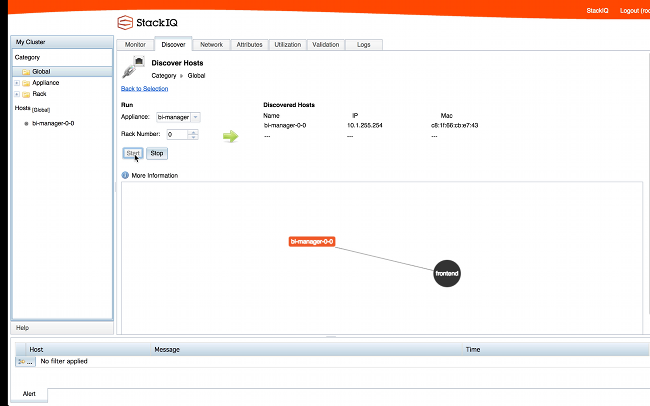
After installing it shows up as below:
1-resized-600.png?t=1412202110685)
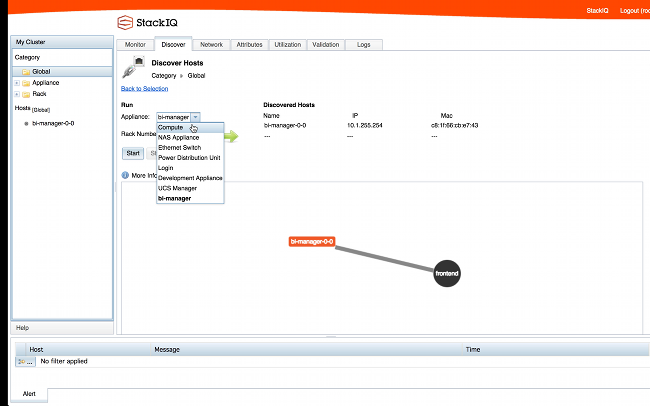
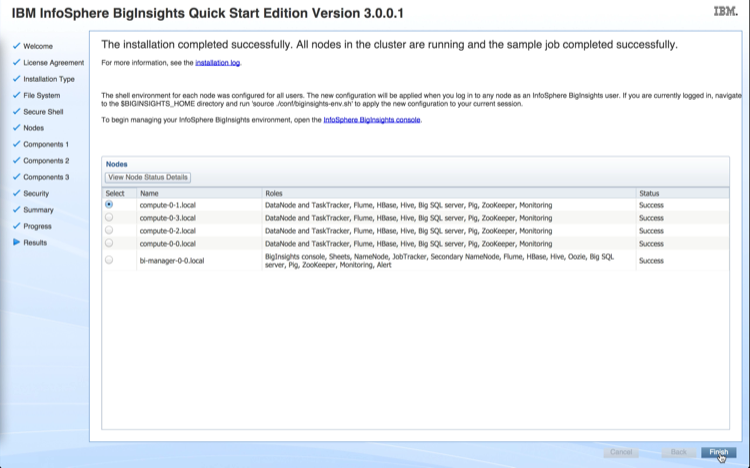
We will install all the other nodes in the cluster as compute nodes. StackIQ Cluster Manager discovers and installs each backend node in parallel (10 to 20 minutes) - no manual steps are required.
-resized-600.png?t=1412202110685)
For more information on installing and using the StackIQ Cluster Manager (a.k.a., Rocks+), please visit StackIQ Support or watch the the demo video.
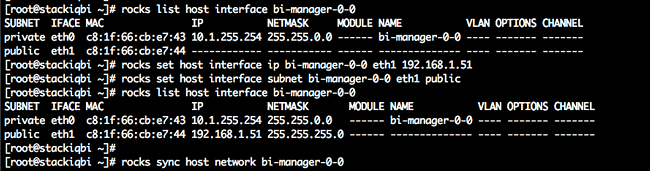
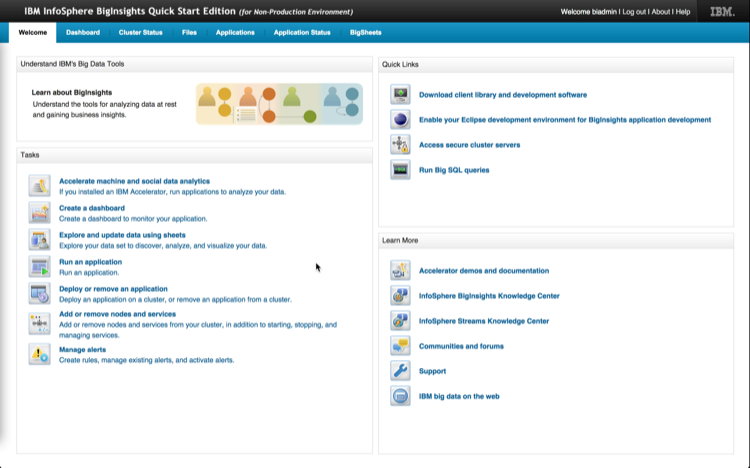
After all the nodes in the cluster are up and running you will be ready to install Cloudera Manager. In this example, the StackIQ Cluster Manager node was named “frontend” and the compute nodes were assigned default names of compute-0-0, compute-0-1, compute-0-2 (3 nodes in Rack 0), and compute-1-0 (1 node in Rack 1).
Step 5: Install Cloudera Manager
SSH into cdh-manager appliance, as root, execute:
# /opt/rocks/sbin/cloudera-manager-installer.bin --skip_repo_package=1
This will install Cloudera Manager with packages from our local yum repository as opposed to fetching packages over the internet.
Step 6: Select What to Install
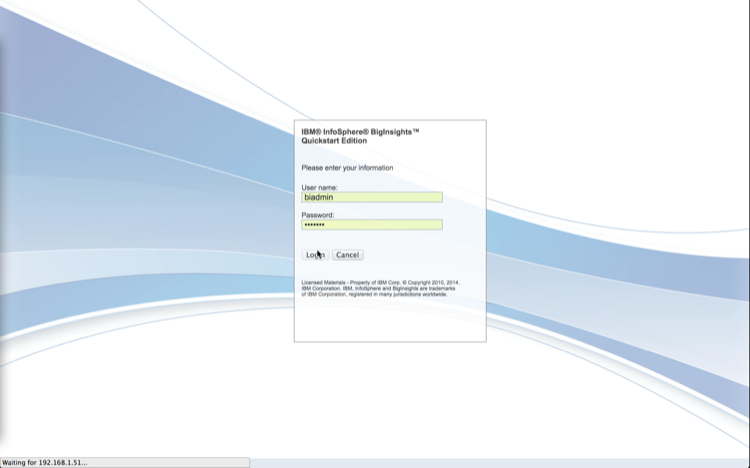
Log into the cdh-manager node http://<cdh-manager>:7180 (where ‘<cdh-manager>’ is the FQDN of your StackIQ Cluster Manager) with username admin and password admin
-resized-600.png?t=1412202110685)
Choose Cloudera Enterprise trial if you want to do a trial run

The GUI will now prompt you to restart Cloudera Manager server. Run the following command on cdh-manager node.
# service cloudera-scm-server restart
After restarting the server, you will be asked to login again. Click Continue in the screen below.

Specify list of hosts for CDH installation e.g., compute-0-[0-3],cdh-manager-0-0

After all the hosts are identified, hit Continue

Choose Use Packages and select CDH4 as the version in the screen below.

Specify custom repository as the CDH release you want to install. Specify http://<frontend>/install/distributions/rocks-dist/x86_64/ for the URL of the repository where <frontend> is the IP address of the cluster’s frontend.
-resized-600.png?t=1412202110685)
In the example above, 10.1.1.1 was the IP address of the private eth0 interface on the frontend.
Choose All hosts accept same private key as the authentication method. Use Browse to upload the private key present in /root/.ssh/id_rsa on StackIQ Cluster Manager.

You will then see a screen where the progress of the installation will be indicated. After installation completes successfully, hit Continue.
_copy-resized-600.png?t=1412202110685)
You will then be directed to the following screen where all hosts will be inspected for correctness.

Choose a combination of services you want to install and hit Continue

Review that all services were successfully installed.

Finally your Hadoop services will be started.
_copy-resized-600.png?t=1412202110685)
Step 7: Run a Hadoop sample program
It is never enough to set up a cluster and the applications users need and then let them have at it. There are generally nasty surprises for both parties when this happens. A validation check is a requirement to make sure everything is working the way it is expected to.
Do this to check to test if the cluster is functional:
-
Log into the the frontend as “root” via SSH or Putty.
-
On the command line, run the following map-reduce program as the “hdfs” user, which runs a simulation to estimate the value of pi based on sampling:
# sudo -u hdfs hadoop jar /usr/lib/hadoop-0.20-mapreduce/hadoop-examples.jar pi 10 10000
Output should look something like this.

Congratulations, you are done!
We’re certain you’ll find this the quickest way to deploy a cluster capable of running Cloudera Hadoop. Give it a shot and send us your questions!
The StackIQ Team
@StackIQ


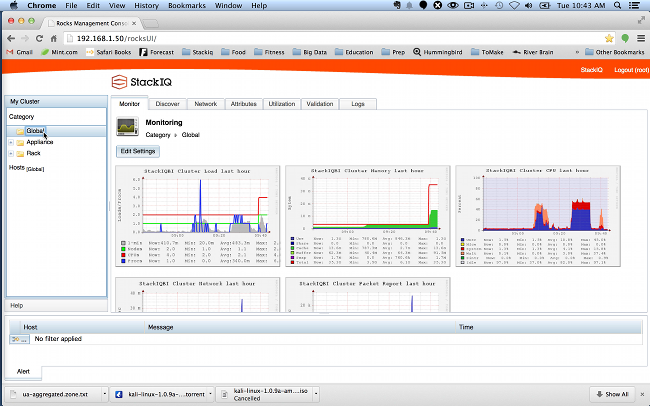
.png?t=1395680874000&t=1412202110685 "Image 1 resized 600")
-resized-600.png?t=1392332089000&t=1412202110685)
1-resized-600.png?t=1392332732000&t=1412202110685)
-resized-600.png?t=1392332143000&t=1412202110685)
-resized-600.png?t=1377629872000&t=1412202110685)